Libraries, categories and tags
You can use a combination of libraries, categories and tags to manage your reusable content in Sitefinity. Libraries are used to store and organize content. Categories and tags are used to classify content.
Libraries
In Sitefinity, content libraries are used to store, organize and manage your website's images, videos, documents and more. Anything you upload into Sitefinity becomes part of your content library and can be used on different pages of your website as reusable content. Reusable content has the ability to be used on multiple pages but only needs to be managed in one area.
You can create as many libraries as you'd like and choose how they display, as well as how these files are tagged, categorized and uploaded.
Organize your content
In order to organize your reusable content, you will utilize a system of libraries. We advise you to first think about the content that you have and group them into related categories. It's best to plan how you will organize your content before you upload the content into Sitefinity. Once you have finalized your groups, can begin creating your libraries.
To create your libraries:
- Go to the dashboard and choose Content from the top of the page
- Select the reusable content type you want to upload, i.e. images, videos or documents
- Click "Create a library"
- Give your library a name, description, and choose the hierarchy (whether it is a parent or child library)
- Click Create
To organize your libraries:
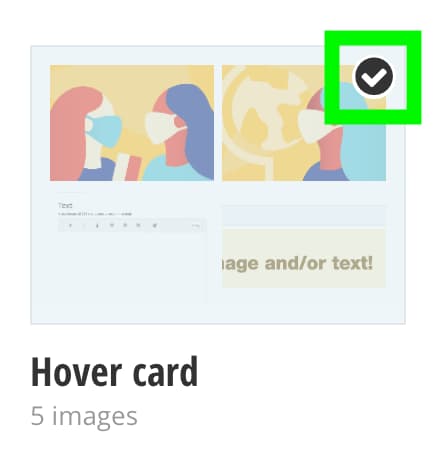
1. Hover over the library folder you would like to move, and then select the checkmark at the top right of the library thumbnail
2. Select the Actions menu that appears toward the top left of the page

3. Select "Move to another library" to move the selected library within its current parent library
4. Or select "Library properties" to move the selected library folder to the top level

NOTES:
- Please note that image, video, and document libraries are the basic starting points for reusable content. If you are unsure where to start, this is a good place.
- Though it is recommended that you to think about your storage structure first, it is not required. You can always come back and make changes.
Organize content without libraries
Many content types may not have "libraries" but still have options to organize. For example, instead of "libraries" events are stored in calendars and enhanced cards are stored in card decks. These storage options are essentially the same as libraries. The only difference is what they are called and the lack of hierarchy options.
The steps for creating these storage options is very similar. The example below uses enhanced cards as an example:
- Go to the dashboard and choose Content from the top of the page
- Select the reusable content type you want to create, i.e. Enhanced Cards
- Click "Create a card deck"
- Give your deck a name
- Publish
Find more information about individual content types here.
Add your content
Now that you have your organization structure set up, it's time to add your content. To add content your library:
- Go to the dashboard and choose Content from the top of the page
- Select the content type for the media you want to upload – i.e. images, videos or documents.
- Click Upload
- Choose files from your computer or use the drag and drop function
- Select the library that you want to store the content in
- Publish
NOTE: For video, Sitefinity will only accept the following file extensions: .mp4, .webm and .ogv
Display your content
Once you've uploaded files to your library, you can display your content.
- Create a page or navigate to an existing page
- Choose the corresponding widget to display your content
- Drag and drop it on the page
- Click Edit
- Select your content
- Save
Widgets are tools used to display your content. You can drag and drop widgets from the right column directly onto your page – no design skills required! Learn more about widgets.
Categories and Tags
At the moment, categories and tags are geared toward helping site builders classify and display their content. They are not yet assisting with search engine optimization (SEO).
Categories
Categories allow you to group content into broadly organized topics, like a table of contents for your website. These topics can be hierarchical, meaning a category can be the parent or child of another category. Because they provide content structure, these topics should be planned and decided ahead of time within your department in order to maintain consistency in the labeling process.
A best practice is to limit the amount of categories from anywhere between 5 to 10 general topics. A limited set of categories will help to keep your website and content focused.
Add categories
To add categories to your content:
- Go to the dashboard and choose Content from the top of the page
- Select the reusable content type you want to categorize, i.e. images, videos or documents
- Select the content item
- Expand the Categories and tags section
- Click the plus button (+) to add categories
- Select from the list of existing categories or click Create a category and follow the prompts to create a new one.
- Publish your changes
There is a way to display categories using the categories widget. Learn how to use the categories widget!
Tags
Tags allow you to describe your content in more detail, similar to a book index but for your website. In most cases, if you need additional classifications outside of the set categories you created, you should be using tags. You can use tags to dissect the content into more specific groupings. Tags are not as structured as categories, and therefore, each tag is singular and unrelated to the next.
That said, you want your tags to be both specific and broad enough to be used for multiple content items. The purpose of a tag is to group your site’s content, so it isn't helpful if a tag only applies to one thing.
NOTE: Please do not use numbers ("1", "2", etc.) as tags for content, because doing so can break page URL structures.
Add tags
To add tags to your content:
- Go to the dashboard and choose Content from the top of the page
- Select the reusable content type you want to categorize, i.e. images, videos or documents
- Select the content item
- Expand the Categories and tags section
- Type in your tags or select from existing tags
- Publish your changes
Use categories and tags
In Sitefinity, you can choose to display your content using categories and widgets. Site visitors cannot see them.
To use your categories and tags:
- Go to the dashboard
- Create a page or navigate to an existing page
- Drag and drop the corresponding widget to display your content on to the page
- Hit Edit
- Select the content items
- Expand the Narrow selection area
- Choose Filter content by...
- Check categories, tags or both
- Hit select under each option to choose your categories and tags
- Hit Done selecting
- Choose the other widget properties in List settings and single item settings
- Save